What is visual regression?
The concept is very simple. Having a picture of what the interface you are testing should look like, while running the tests, you compare this picture with the actual state. This way you find out if any changes have occurred. This makes it possible to detect defects that would not be captured neither by classic automatic regression tests, nor, most likely, by the efficient eye of the tester performing exploratory tests.
Cypress does not provide this feature to us. The end. :) Fortunately, there are external plugins, both paid and free. I decided to choose the free one with the most stars on github - cypress-image-snapshot. This tool is a wrapper for the _ is-image-snapshot_ tool. 2.3k stars on github gives a high degree of confidence that the tool will deliver what we expect and we will not be disappointed in the middle of the implementation.
AI-Powered User Story Analysis for Smarter Testing
Unlock the full potential of your software development process with our AI-driven tool! You will find it here.

Plugin setup
Installation is simple in the root project of the react-redux-realworld-example-app project, I run the command:
npm install --save-dev cypress-image-snapshotIn addition, in the file:
<rootDir>/cypress/plugins/index.jsWe need to add a code block like this:
const {
  addMatchImageSnapshotPlugin,
} = require('cypress-image-snapshot/plugin');

module.exports = (on, config) => {
  addMatchImageSnapshotPlugin(on, config);
};
And in the file:
<rootDir>/cypress/support/commandsWe need to add a custom command like this:
import { addMatchImageSnapshotCommand } from 'cypress-image-snapshot/command';

addMatchImageSnapshotCommand();
After this process, we have a design ready for visual testing!
Tests
In the cypress / integration directory, he adds the file: VisualTest.spec.js. I am creating a test that will check the screen displayed to the user after logging into the application:
    it('Successfull login', function () {
        cy.visit('/login')
            .createNewUserAPI('test', 'test@test.com', 'test')
            .login('test@test.com', 'test');
        cy.matchImageSnapshot();
    })
In the context of the topic described, the key is the line:
cy.matchImageSnapshot();Running a test for the first time will create an image that will serve as a reference for future tests from now on.
The exact logic of the _cy.matchImageSnapshot () _ function looks like this:
- Screenshot using the function: with the name consistent with the current test
- Check if the screenshot exists in the directory:
/cypress/snapshots, if so, diff the images - If there is a difference between the images, save the screenshot showing the difference in the directory:
/cypress/snapshots/diff_output
It’s time to verify the accuracy of the library’s operation. After logging in, the following text is displayed: “No articles are here … yet.” I remove one dot - the change is difficult to verify during regression. After changing, the string looks like this: “No articles are here … yet”.
After running the test, it turns out that the library is doing great. Such a small change was caught and communicated by failing the test.
A failed test is communicated in a detailed manner. We can find out how big the difference is, in percentage and pixels:
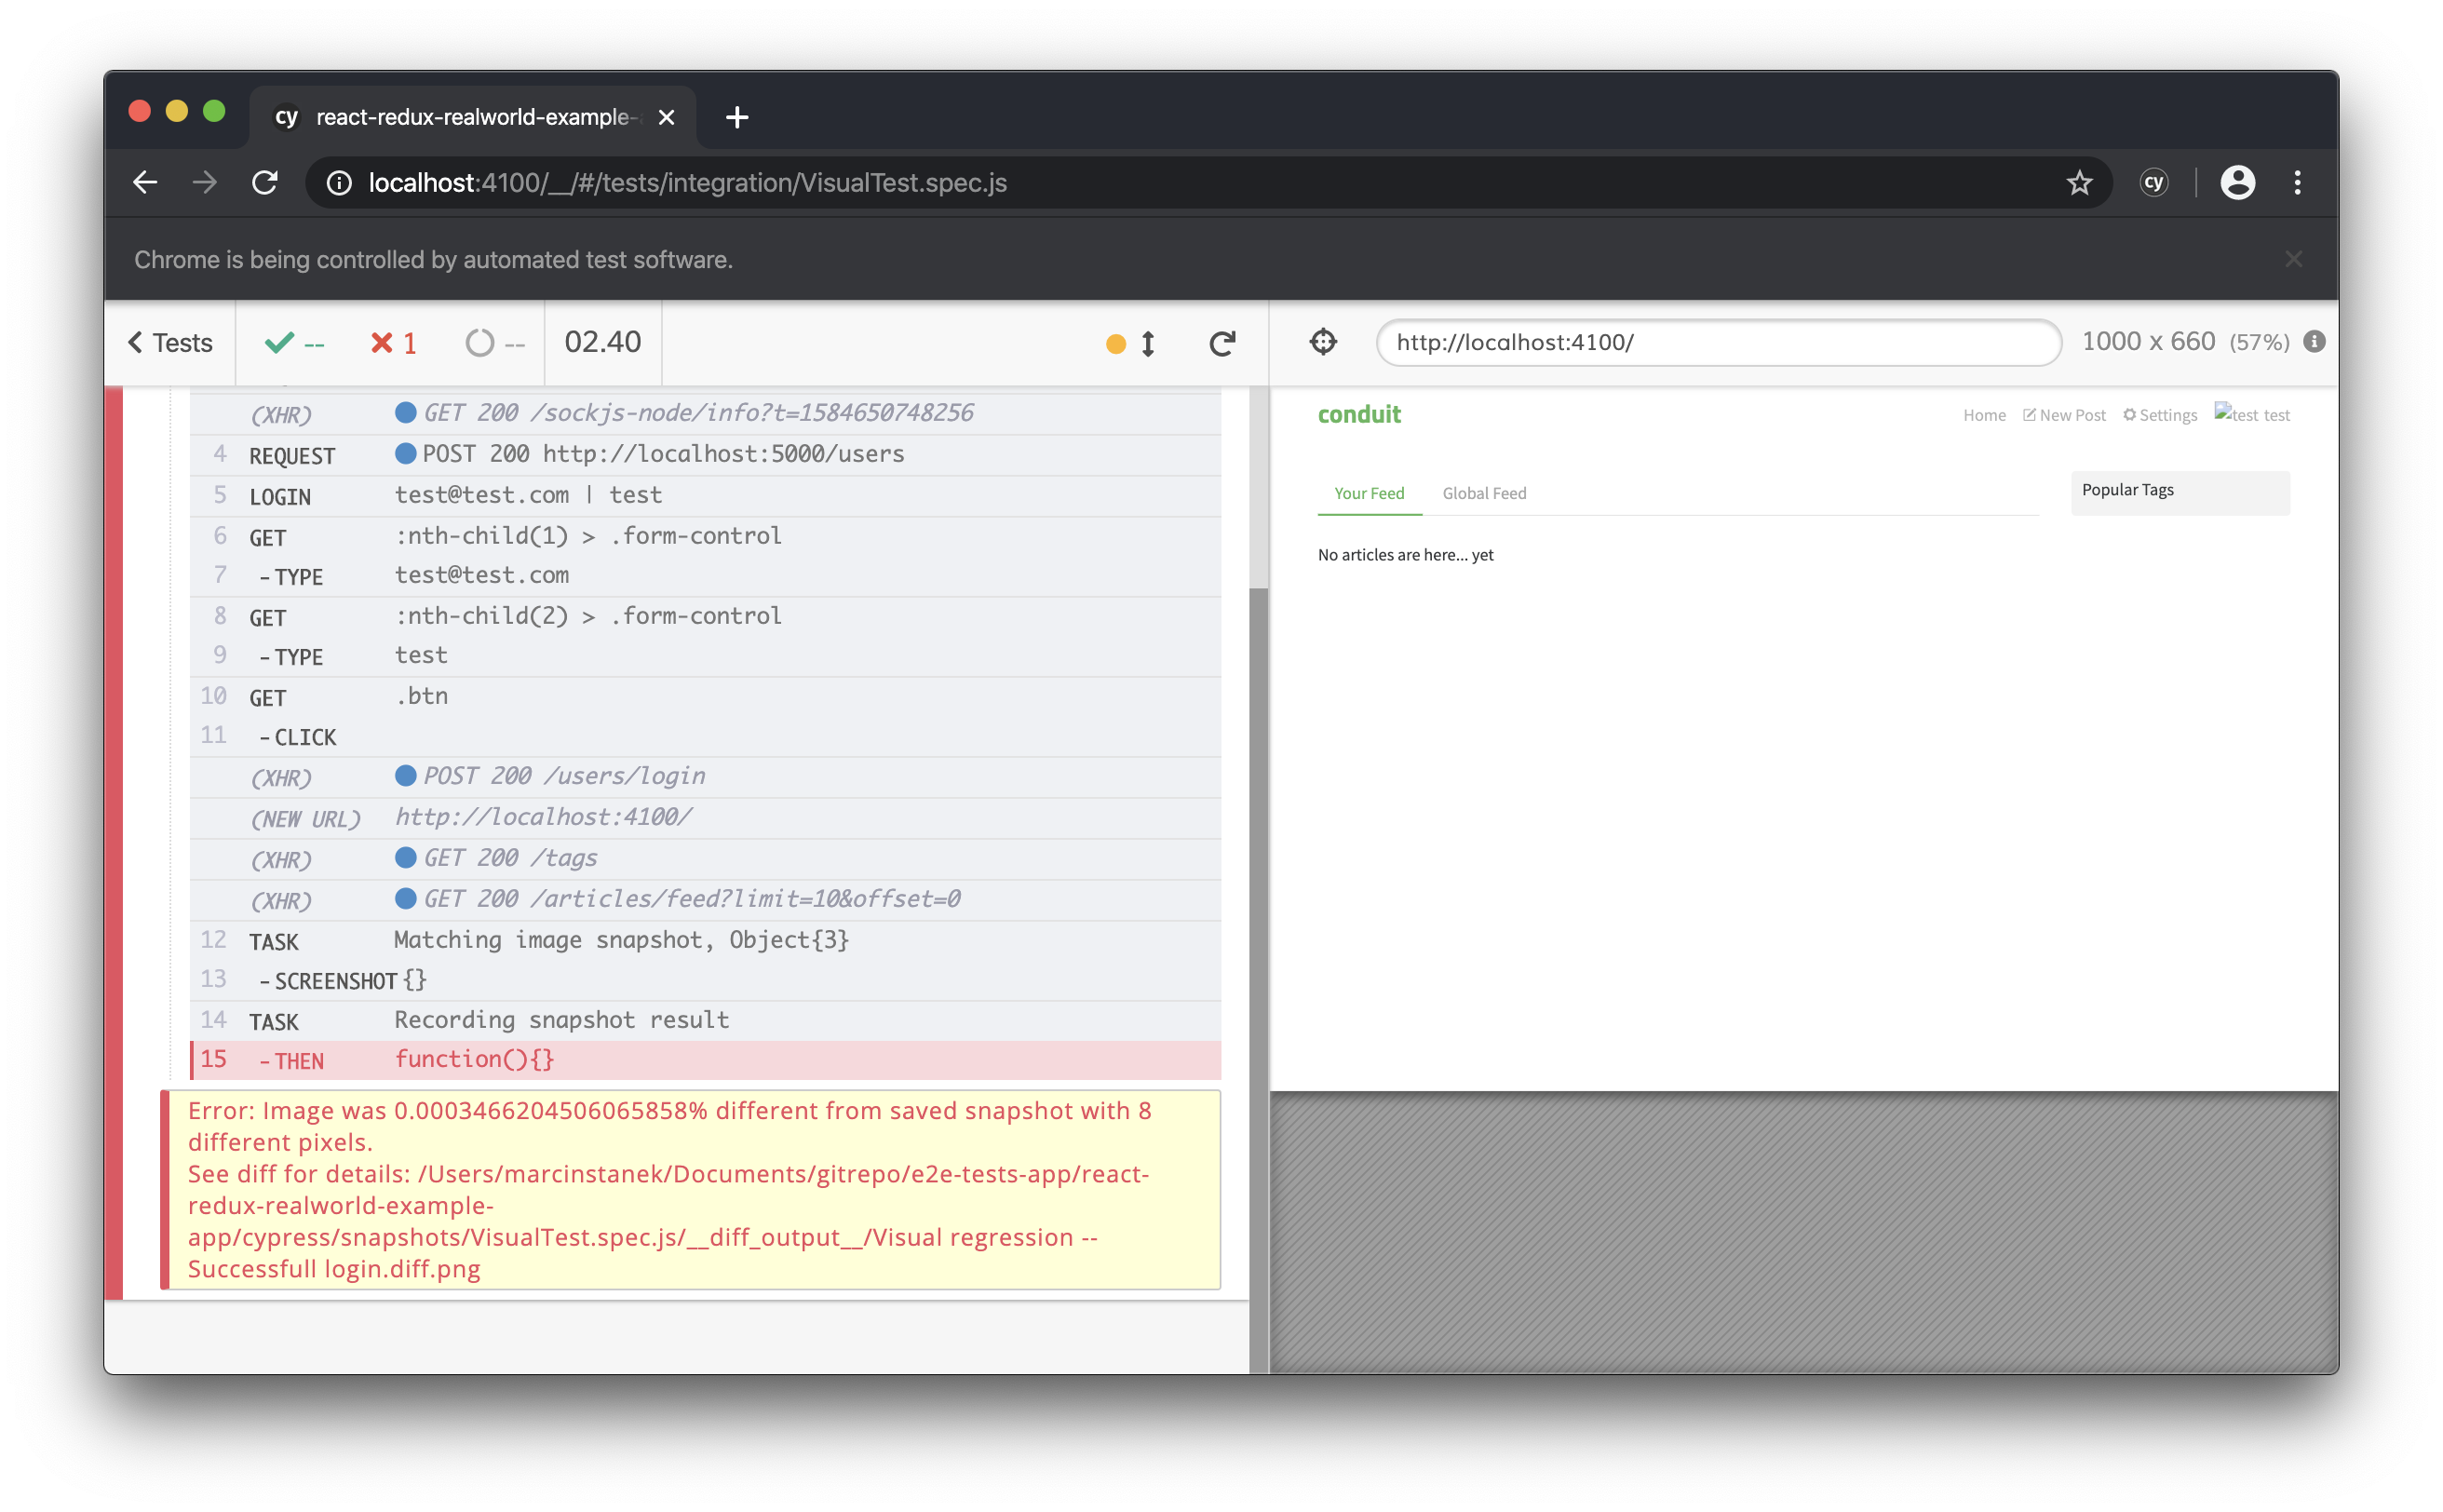
In addition to the above-mentioned information, the library also produces a diff where we can see the difference visually. Changes underlined in red. The difference is only 8 pixels, so you have to zoom in to see the effect.

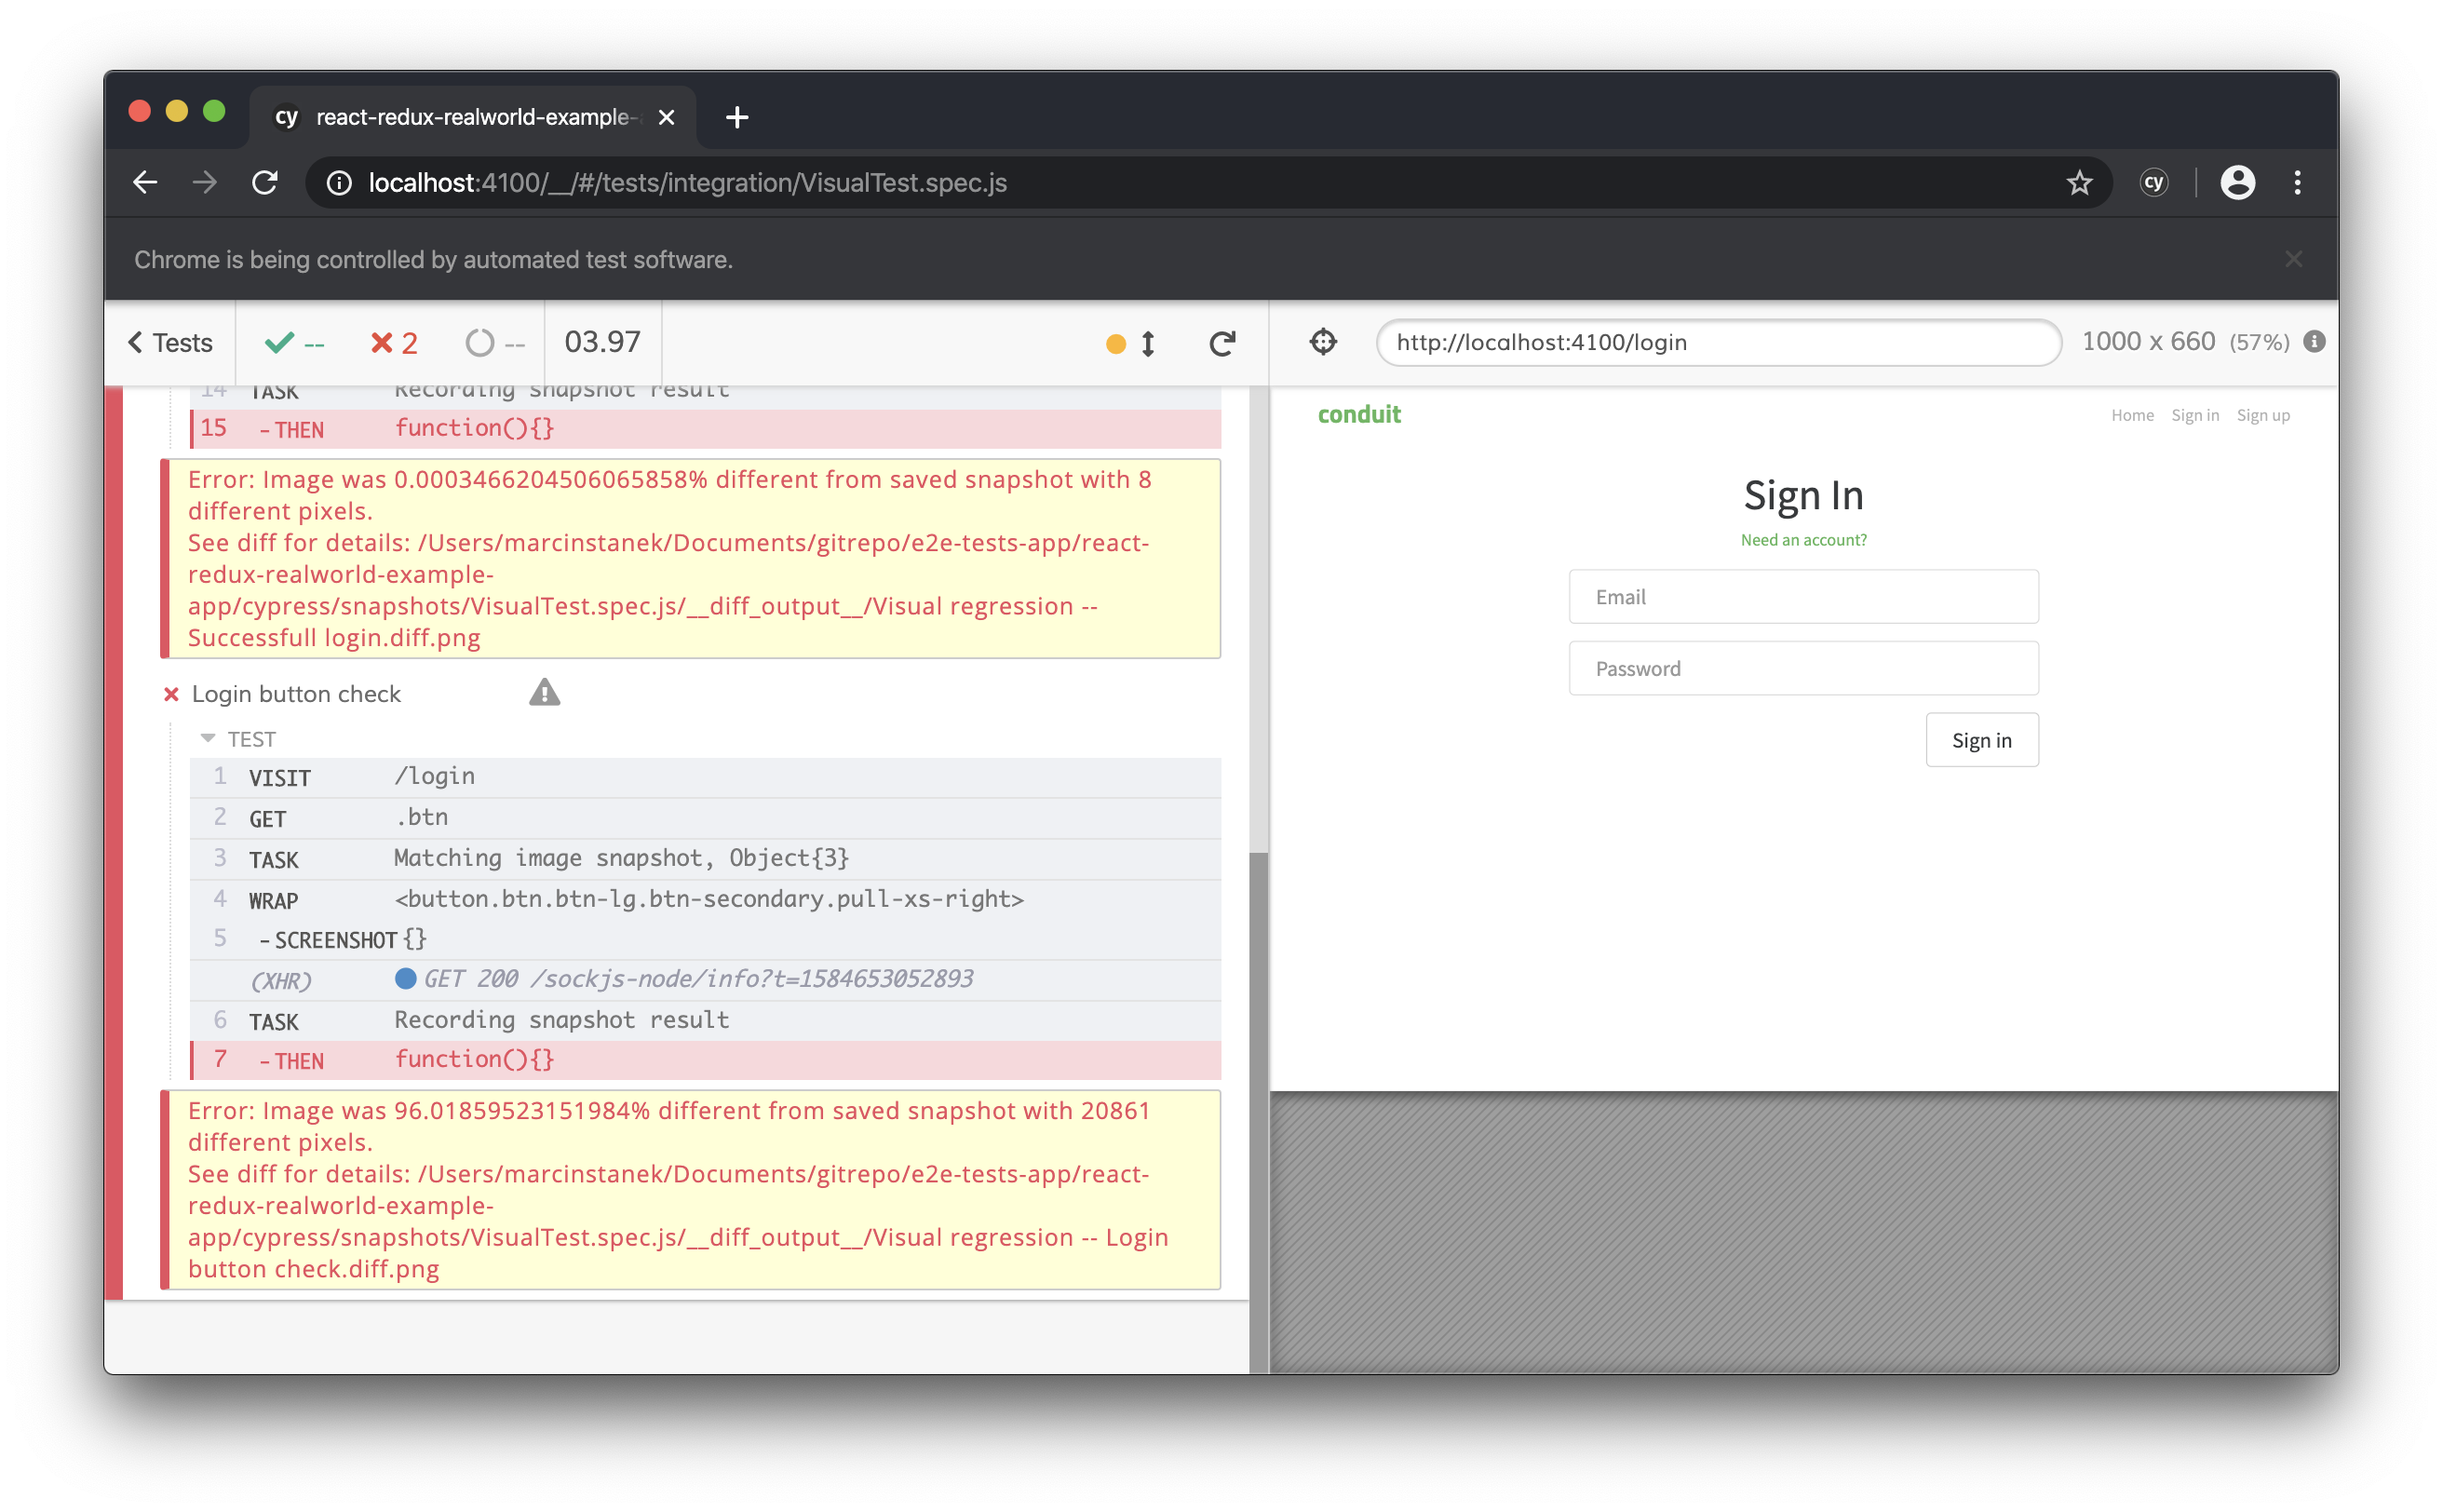
In addition to the visual regression of the entire screen, we can also perform the regression of a specific element on the page. This is possible thanks to the syntax:
cy.get(selector).matchImageSnapshot();I implement this type of test by verifying the login button:
    it('Login button check', function () {
        cy.visit('/login');
        cy.get('.btn').matchImageSnapshot();
    })
The operation is the same as for the entire screen. The only difference is the context of the verification. In this case, I am going to verify the function as well. I changed one class for a button, from “btn-primary” to “btn-secondary”, which changes the button color. The library can handle it, of course. And the changes are much more visible.

Useful commands
--env failOnSnapshotDiff=falseIf we want to temporarily ignore the visual test results, this command will enable us to do so. Importantly, we only ignore the results, the tests will be performed. Example of use:
npx cypress run --env failOnSnapshotDiff=falseAnother interesting command:
--reporter cypress-image-snapshot/reporterIt allows you to use a special reporter that will allow us to quickly compare the screenshots made by the tool. On a Mac, e.g. if you are using an iTerm2 terminal, the tool displays a screenshot in the terminal window. Unfortunately, it doesn’t work very well. As you can see in the screenshot attached. Example of use together with ignoring test results:
npx cypress run --reporter cypress-image-snapshot/reporter --env failOnSnapshotDiff=false {:alt=“raportowanie”}
--env updateSnapshots=trueThis command will update the screenshots that are used as a pattern. After executing the commit command for new dumps, we update our test cases. Example of use:
npx cypress run --env updateSnapshots=trueSummary
I am very positively surprised by the ease of implementing visual tests when we have the foundations of functional tests ready. All functions are well documented. I implemented everything I needed in a simple and legible way. Their results are also transparent. The only unknown for me is the use of visual tests in CI. Theoretically, we have all the tools that will allow you to configure the tests. However, in this post, I do not dispel my doubts.
The code can be seen here:
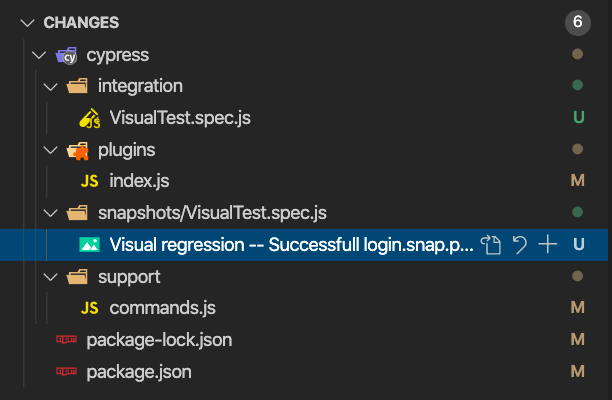
https://github.com/12masta/react-redux-realworld-example-app/tree/7-cypressChangeset:
https://github.com/12masta/react-redux-realworld-example-app/pull/9/files