Azure DevOps, Cypress and Test Report
When we have a ready piepline with Cypress tests, it is relatively easy to create a test report. This is done using the Publish Test Results step, which enables us to transform the test results into a readable report.
Test reports provide an effective and consistent way to view the results of tests performed on various test platforms, and are also used to measure the quality of the pipeline, and facilitate problem identification and resolution.
AI-Powered User Story Analysis for Smarter Testing
Unlock the full potential of your software development process with our AI-driven tool! You will find it here.

Publish test results to Azure DevOps
To achieve the above-mentioned effect, we need to add a new task to our pipeline called Publish Test Results. We can find it in the Tasks section when editing our pipeline.

This step supports several file formats in which the test results are stored. These are:
- JUnit
- NUnit
- VSTest
- XUnit
- CTest
It turns out that Cypress supports reporters built into the Mocha library by default, plus two additional teamcity and junit. As you can see there is a common point here, junit. This allows for efficient adaptation of Cypress. You only need to add an additional script in npm:
  "scripts": {
    (...)
    "cy:run-junit-reporter": "cypress run --reporter junit --reporter-options 'mochaFile=results/TEST-[hash].xml,toConsole=true'",
    (...)
  }
Argument:
--reporter junit_ Means I am using the junit reporter to present my test results. The very important part is the argument:
--reporter junit --reporter-options 'mochaFile=results/TEST-[hash].xml,toConsole=true'Each test file, ie specification, is processed completely separately during each test run. Thus, each run of the specification replaces the previous report file. To keep unique reports for each specification file, use [hash] in the name of the report file. This configuration will create separate XML files in the results folder for each test file. Then, merge the reported output into a separate step. In our case, we will do it in Azure DevOps, I will describe it in a moment. After merging the package.json file with the new script, we can go back to editing the pipeline in Azure DevOps. I edit the step: Execute cypress tests which looks like this:
- script:
    npm run cy:run-junit-reporter
  continueOnError: true
  displayName: 'Execute cypress tests'
I changed two things. The npm script that I run: npm run cy: run-junit-reporter, I described it above. Apart from that, I added one parameter: continueOnError: true. As a result, test failures in this step do not interrupt Pipeline execution. This is required for the step that I am about to describe to take place. Otherwise, in the event that one of the tests failed, the build would fail and the test publication step would not be completed, therefore we would not be able to display the report.
The next step is to publish the test results. The definition of this step is as follows:
- task: PublishTestResults@2
  inputs:
    testResultsFormat: 'JUnit'
    testResultsFiles: '**/TEST-*.xml'
    failTaskOnFailedTests: true
    testRunTitle: 'Cypress tests'
We need to add some parameters to properly configure this step. The first is:
testResultsFormat: 'JUnit'As described above, this step supports several types of files containing test data. This type must match the data passed by our runner, JUnit in this case.
testResultsFiles: '**/TEST-*.xml'It is used to establish the naming convention of the files in which the test data is stored.
failTaskOnFailedTests: trueWhen the field is true, the job will fail if any of the tests in the result file are marked as failed. This setting is needed to move the pipeline fail from the Execute cypress tests step to the publication of the test result. Without this setting it would be impossible.
testRunTitle: 'Cypress tests'The name that will appear in the generated report.
These are all the steps needed to connect reporting in Azure DevOps, the .yml file that enables it looks like this:
trigger:
  paths:
    include:
      - '*'

pool:
  vmImage: 'ubuntu-latest'

steps:

- task: NodeTool@0
  inputs:
    versionSpec: '10.x'
  displayName: 'Install Node.js'

- script:
    npm install
  displayName: 'Install dependecies'

- script:
    npm run cy:verify
  displayName: 'Cypress verify'

- script:
    npm run cy:run-junit-reporter
  continueOnError: true
  displayName: 'Execute cypress tests'

- task: PublishTestResults@2
  inputs:
    testResultsFormat: 'JUnit'
    testResultsFiles: '**/TEST-*.xml'
    failTaskOnFailedTests: true
    testRunTitle: 'Cypress tests'
After saving the changes, when our pipeline is executed, the Tests tab appears, where we can see our report. This page has the following sections:

- Summary: provides key quantitative measures to perform a test, such as total number of tests, failed tests, pass percentage, and more. It also provides differential rates of change compared to the previous performance.
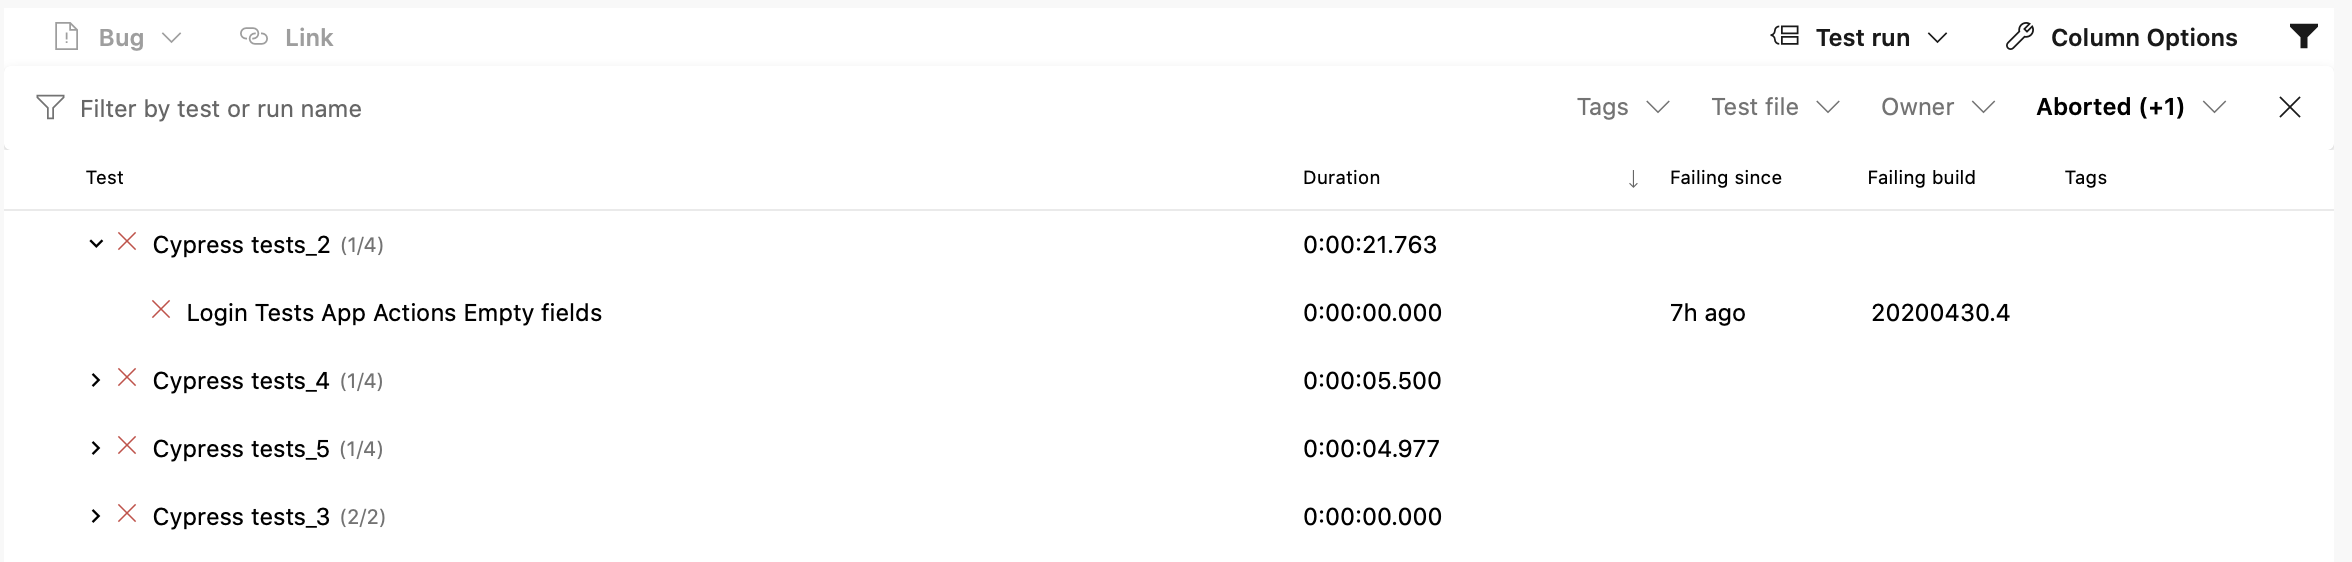
- Results: lists all tests performed and reported as part of the current version or release. The default view only shows failed and aborted tests to focus on tests that require your attention. However, you can select other results using the provided filters.
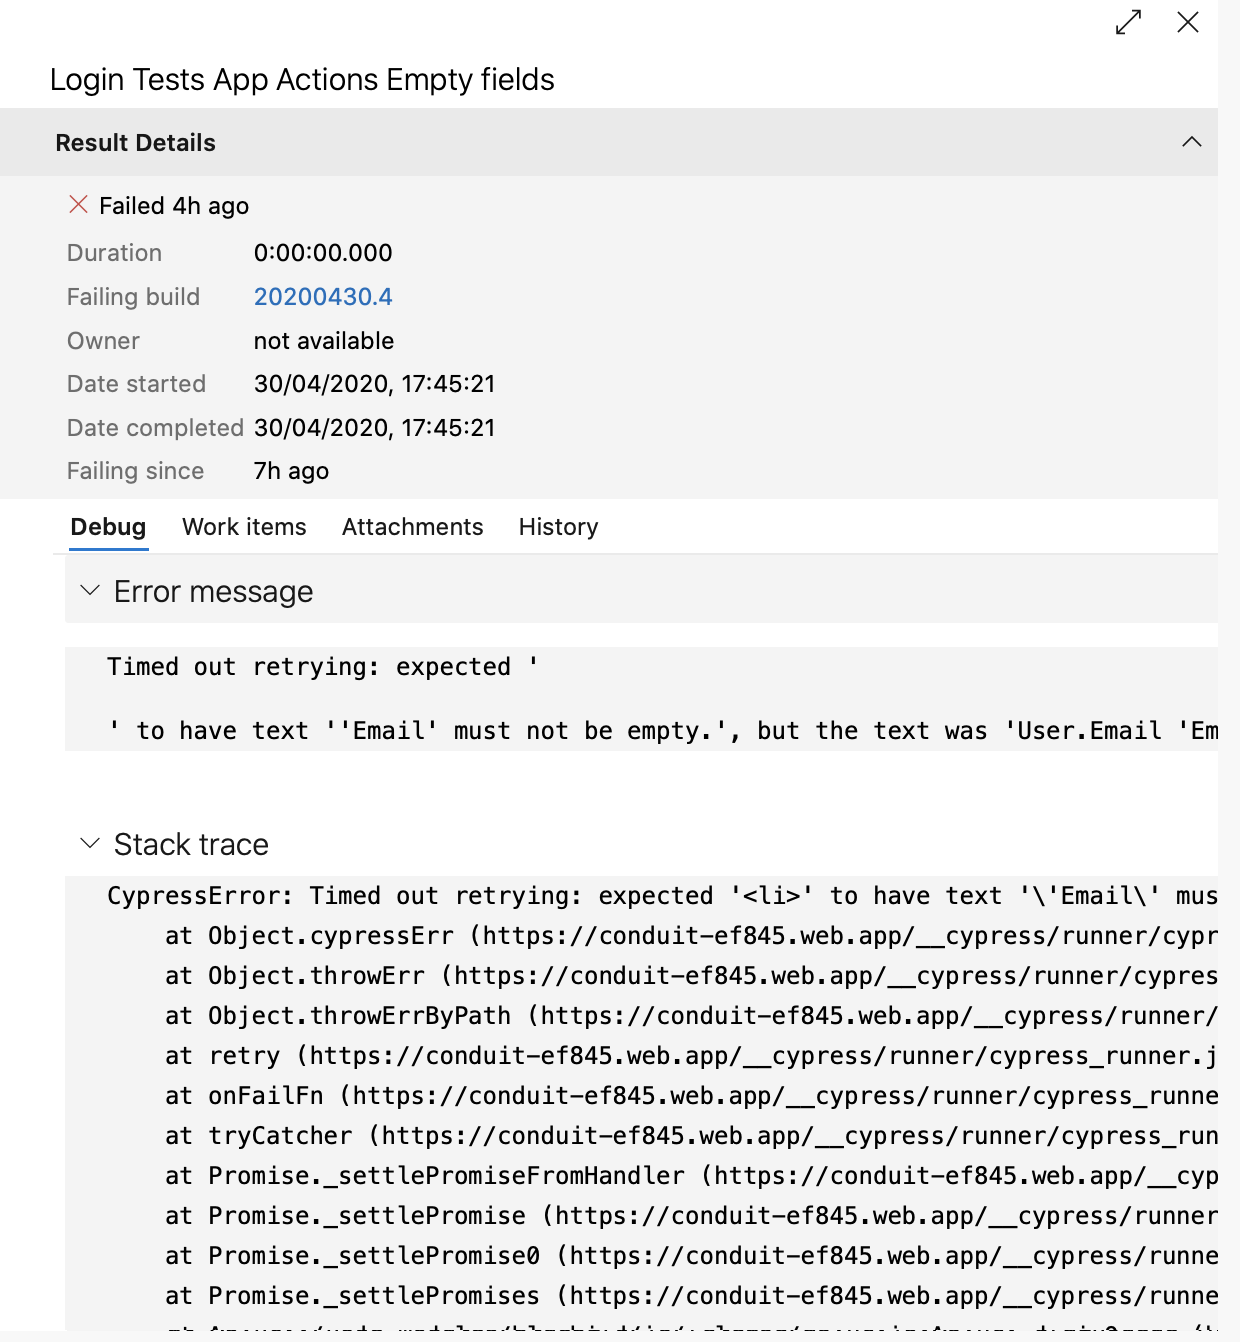
- Details: a list of tests that you can sort, group, search, and filter to find the test results you want.
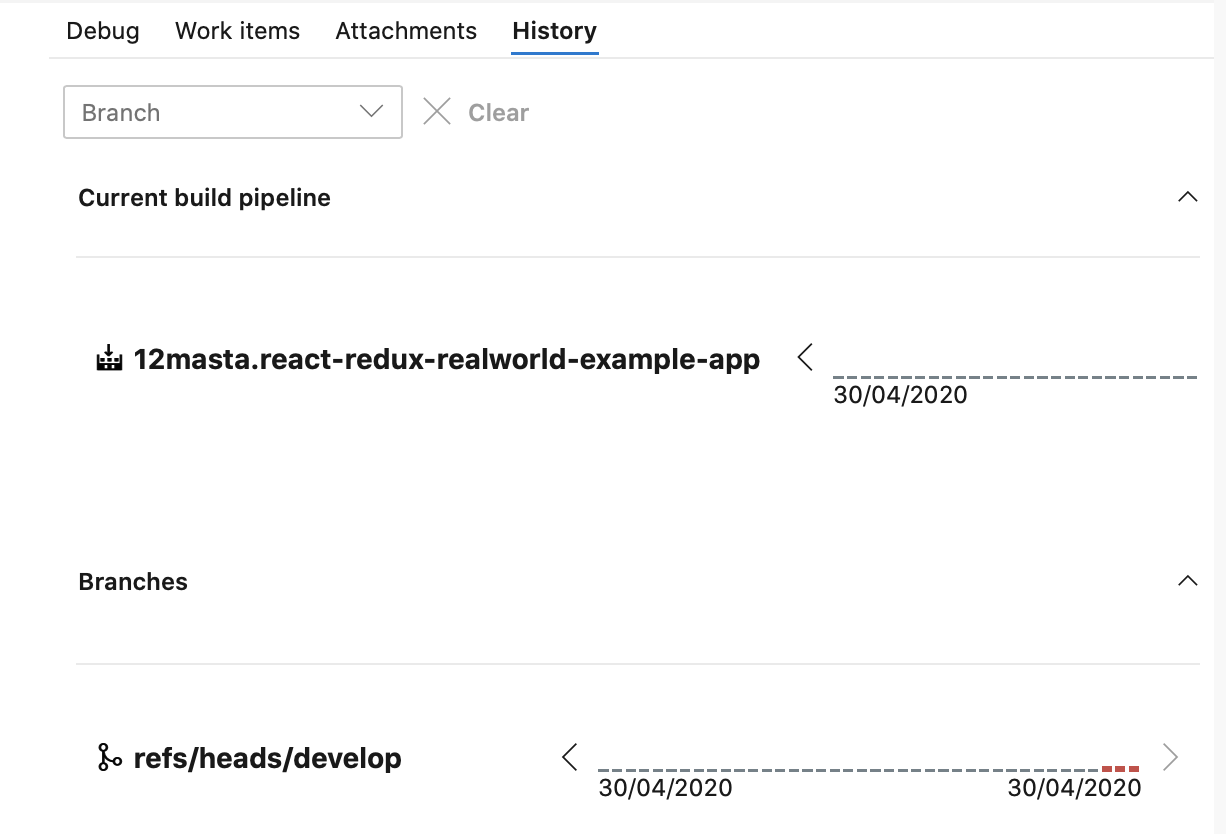
- History: The history of test execution can give a test engineer much of the information they need. When troubleshooting a problem, it is helpful to know how the test has performed in the past. This card contains the history of the tests in the context of the test results. Test history information is disclosed progressively, starting with the current build pipeline to other branches, or the current stage to other stages, for build and release, respectively.
Summary
Integrating the tests with the reporting functions in Azure DevOps turned out to be very easy. The provided reports are very legible and give us many interesting functions. I will only add that this is not the end of the possibilities. I will present them in the next post.