Introduction
Hi, I would like to share with you my own technique of creating tests with usage of Cypress tool.
I to describe here a process of creating e2e tests for application build on backend (ASP.NET Core) and frontend (React).
This and next posts requires download and configuration of two below projects:
https://github.com/12masta/react-redux-realworld-example-app

https://github.com/12masta/aspnetcore-realworld-example-app
I described their setup in this post: [Environment preparation]({% post_url 2020-05-20-environment-setup-en %})
AI-Powered User Story Analysis for Smarter Testing
Unlock the full potential of your software development process with our AI-driven tool! You will find it here.
Quick setup
To be able to use this tool, first we must install it in our project.
Ideally is to refer to Getting Started article on authors website
https://docs.cypress.io/guides/getting-started/installing-cypress.htmlI will describe it on my example. Using terminal I switch to my project directory “react-redux-realworld-example-app” where I will add Cypress:
Using npm tool I execute below command
npm install cypress --save-devIt will install it locally as developer tool
Now below command
npx cypress openOpens for us newly installed tool. Now when we have setup finished (simple, doesn’t it?), we can start write tests.
First test
Previous section have created a new directory on root level, named Cypress. You can find there examples of usage, however I will omit of describing them. Let’s begin instead with writing first tests.
So in directory:
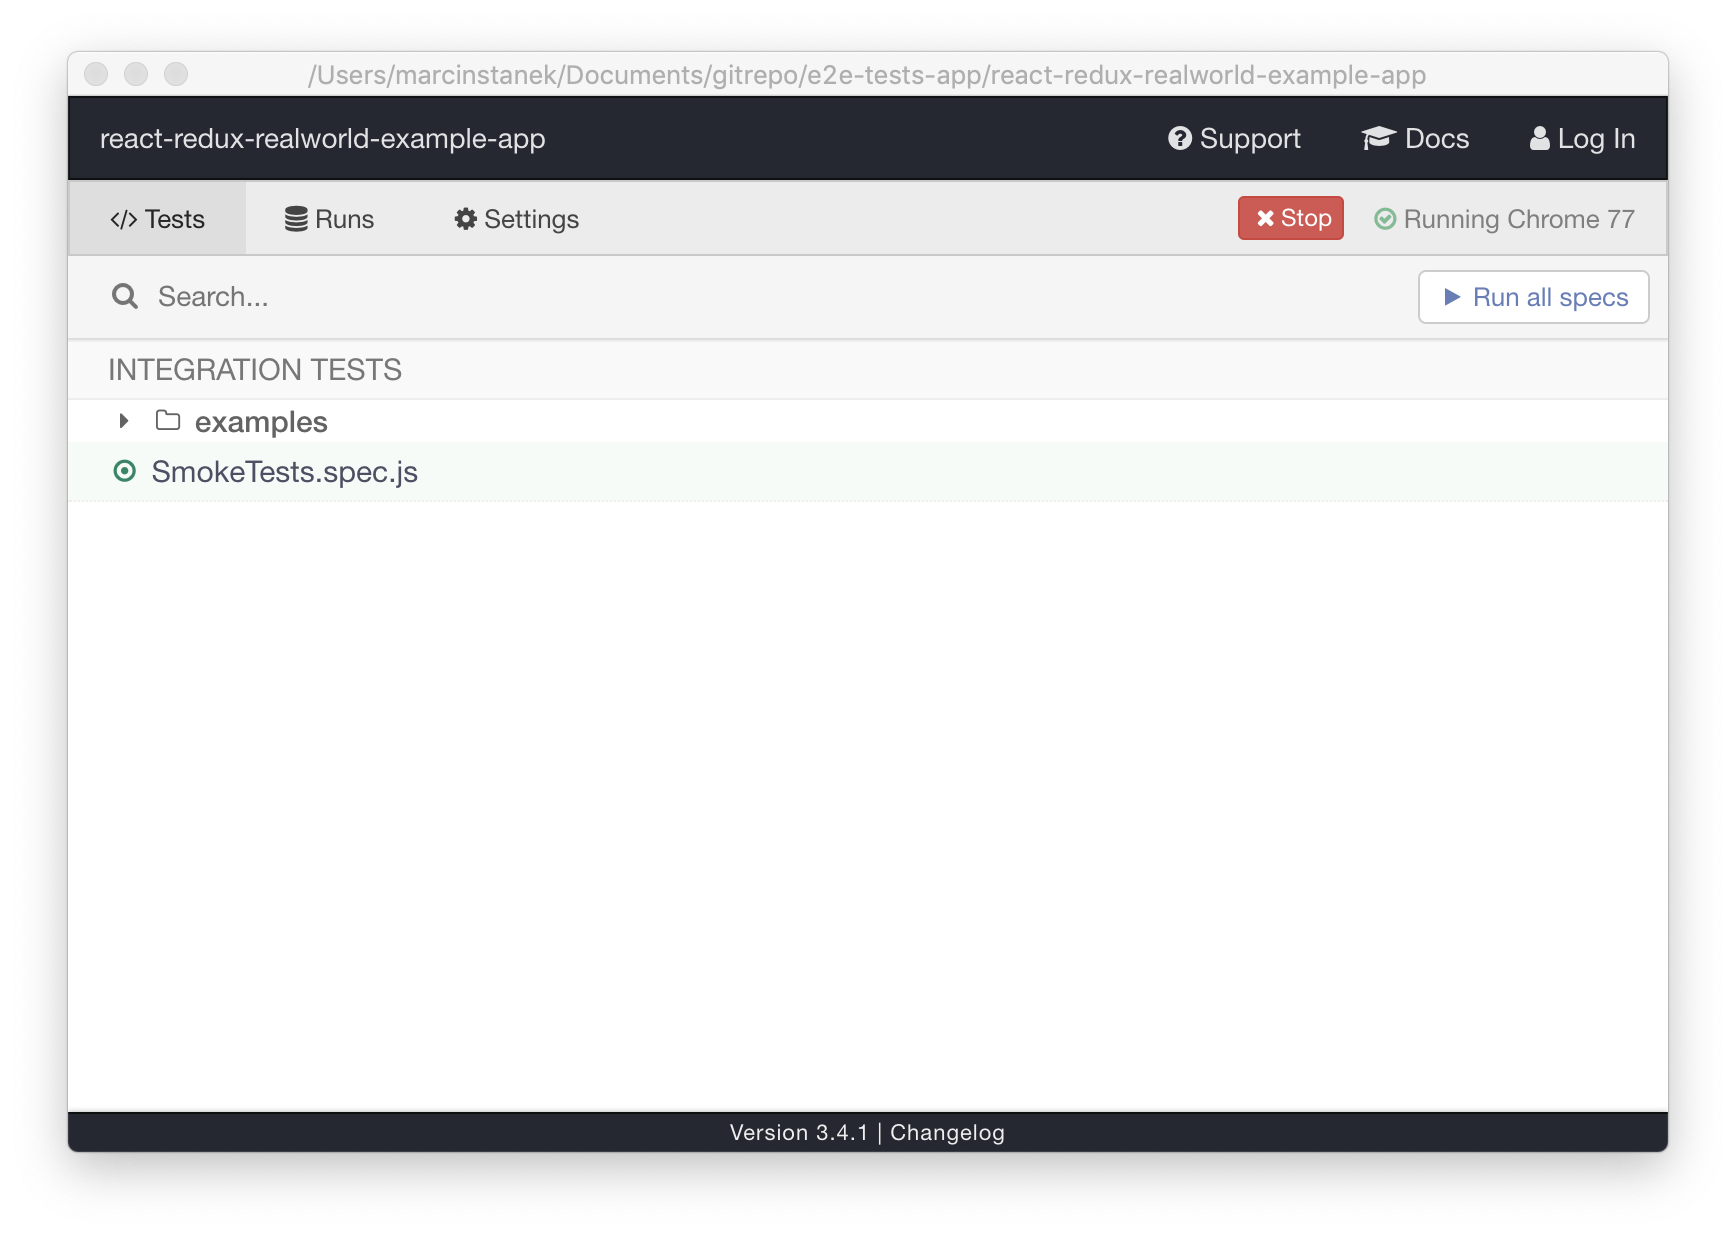
../cypress/integration/I create a new file named SmokeTests.spec.js. It should be immediately identified and displayed in window:
Next step is to open newly created file and write first test, which will open our application. Use below command in order to achieve that:
cy.visit()We need just pass an URL as function parameter
describe('My First Tests', function() {
    it('Visits app', function() {
    cy.visit('http://localhost:4100/')
    })
})
After save and double click on SmokeTests.spec.js in Cypress window you should see following result:

In Cypress window you can notice a VISIT operation which indicates that test has visited our website.
Great, we’ve wrote our first test which visit our website. It doesn’t do much, nor interact or do any assert.
Search for element
To be able to execute any interaction first we must search an element in HTML tree. We can use function:
cy.get()And pass a css selector which allows search desired element. In current example it is:
'.navbar-brand'Final code:
it('My First Get', function() {
  cy.visit('http://localhost:4100/')
  cy.get('.navbar-brand')
})
After execution a verification of the test end up with success. Although we haven’t added any assertion, all tests have passed. It’s due the fact that Cypress does do internal checks. In case of missing selector a failure report would appear.
When we change code to:
cy.get('.navbar-brand-fail-me')Result will be:
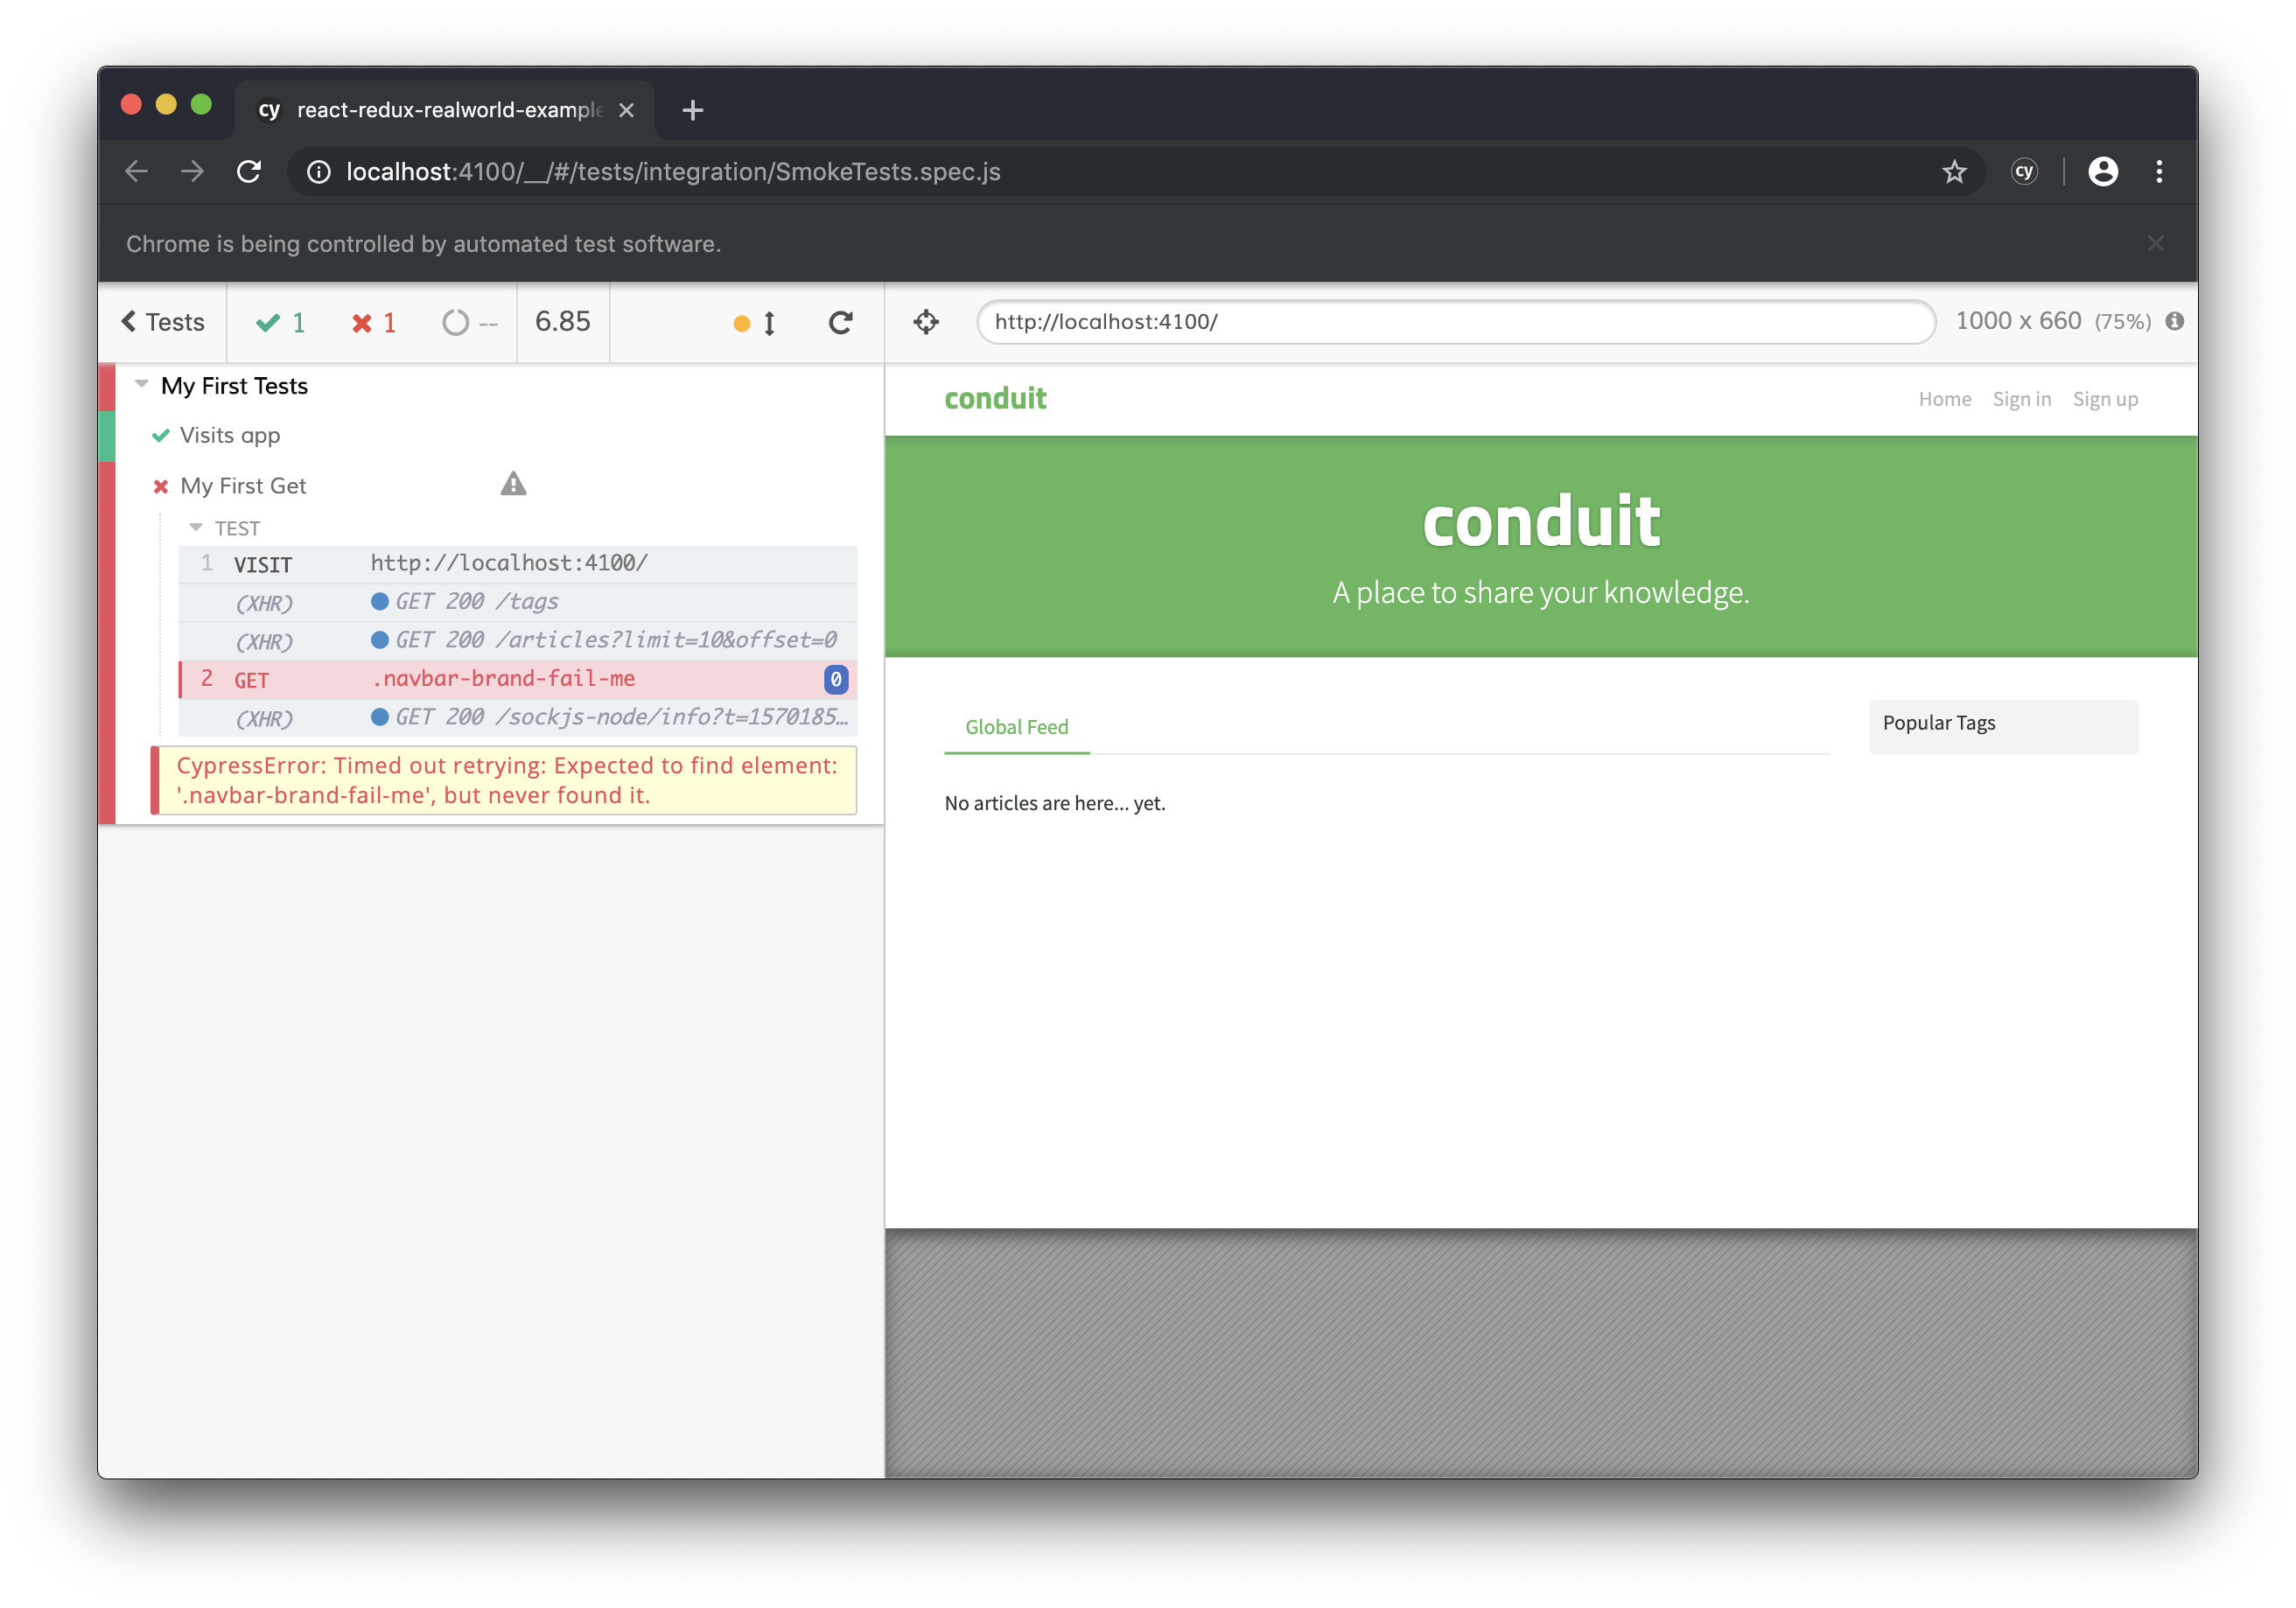
Clik!
We can search an element, let’s now click on it. Here’s the function:
.click()We use it at the end the search function:
cy.get().click()It is called Fluent Interfaces also known as “chaining”.
Our code:
it('My First Click', function() {
  cy.visit('http://localhost:4100/')
  cy.get(':nth-child(3) > .nav-link').click()
})
Look of application window after execution:

Assertion
When we know how to click on element, we can add an assertion which will verifies if redirection happens into correct url adress. Method is named:
.should()Our code:
it('My First Assertion', function() {
cy.visit('http://localhost:4100/')
cy.get(':nth-child(3) > .nav-link').click()
cy.url().should('include', '/register')
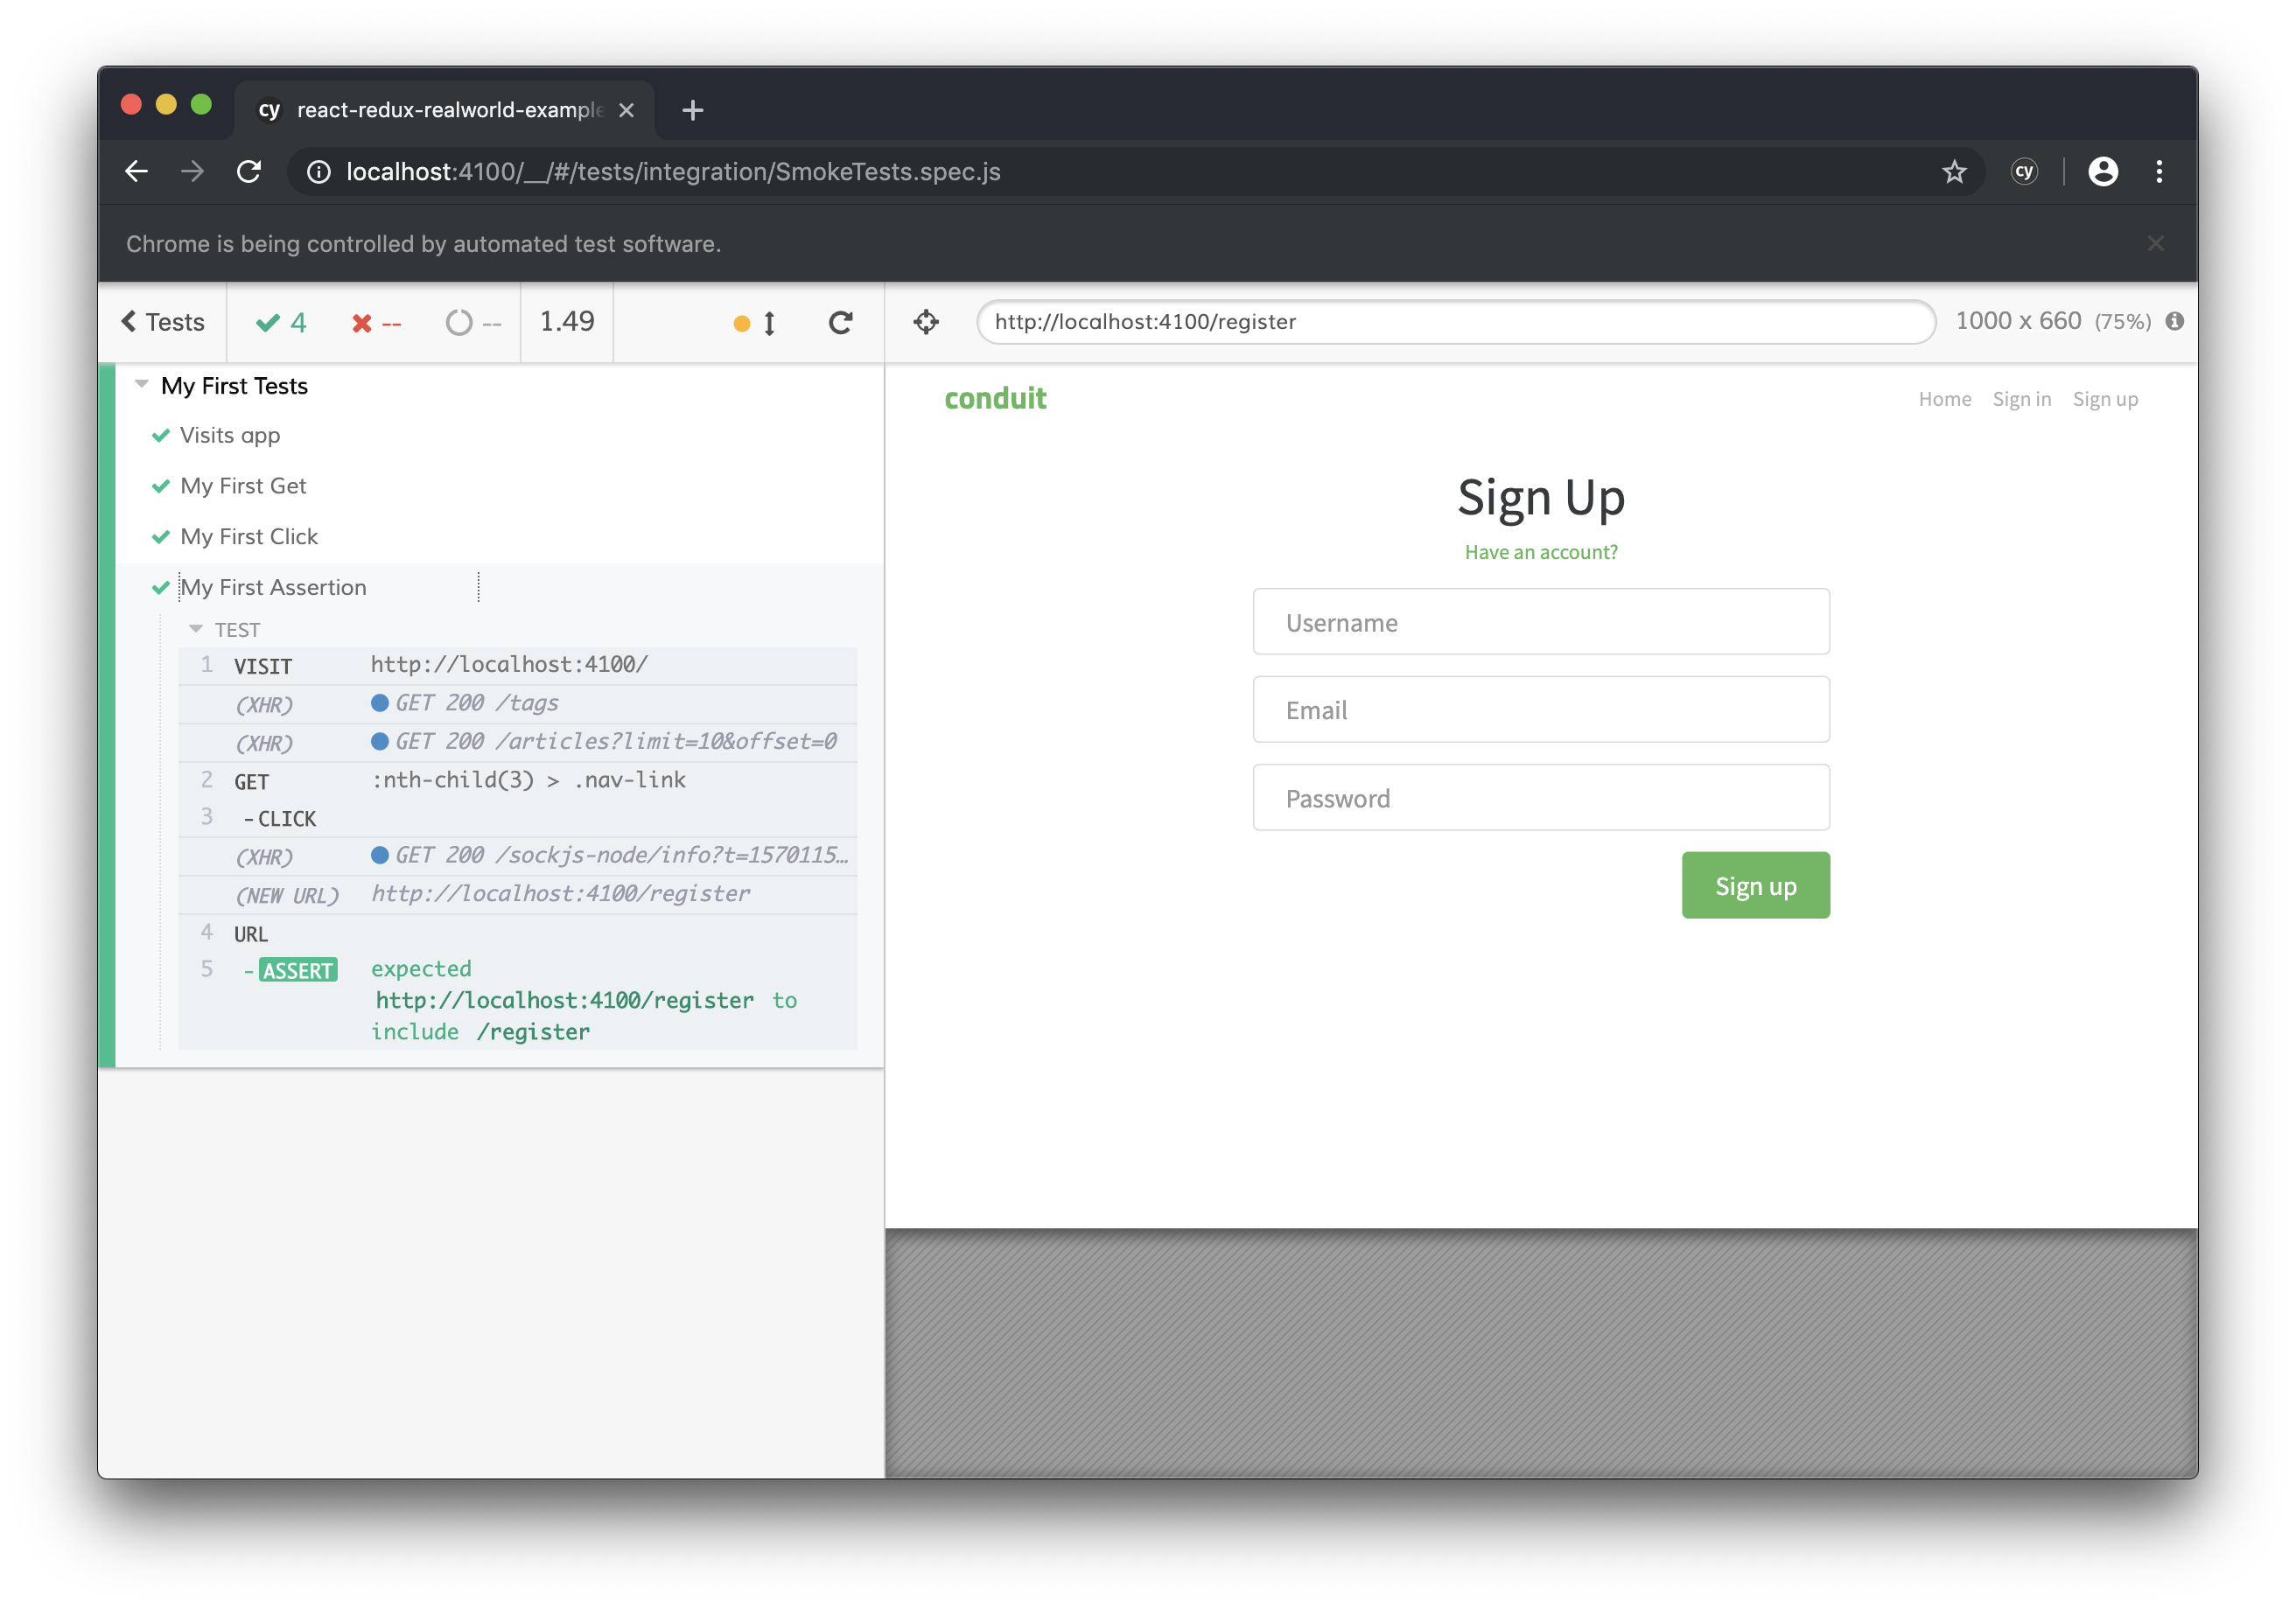
})Test have 3 steps: go to website, click the button, ensure we’ve been redirected to registration page.
Application window after test execution will look:
Input handle
Function below allows write a text to input:
.type()Example test code will be:
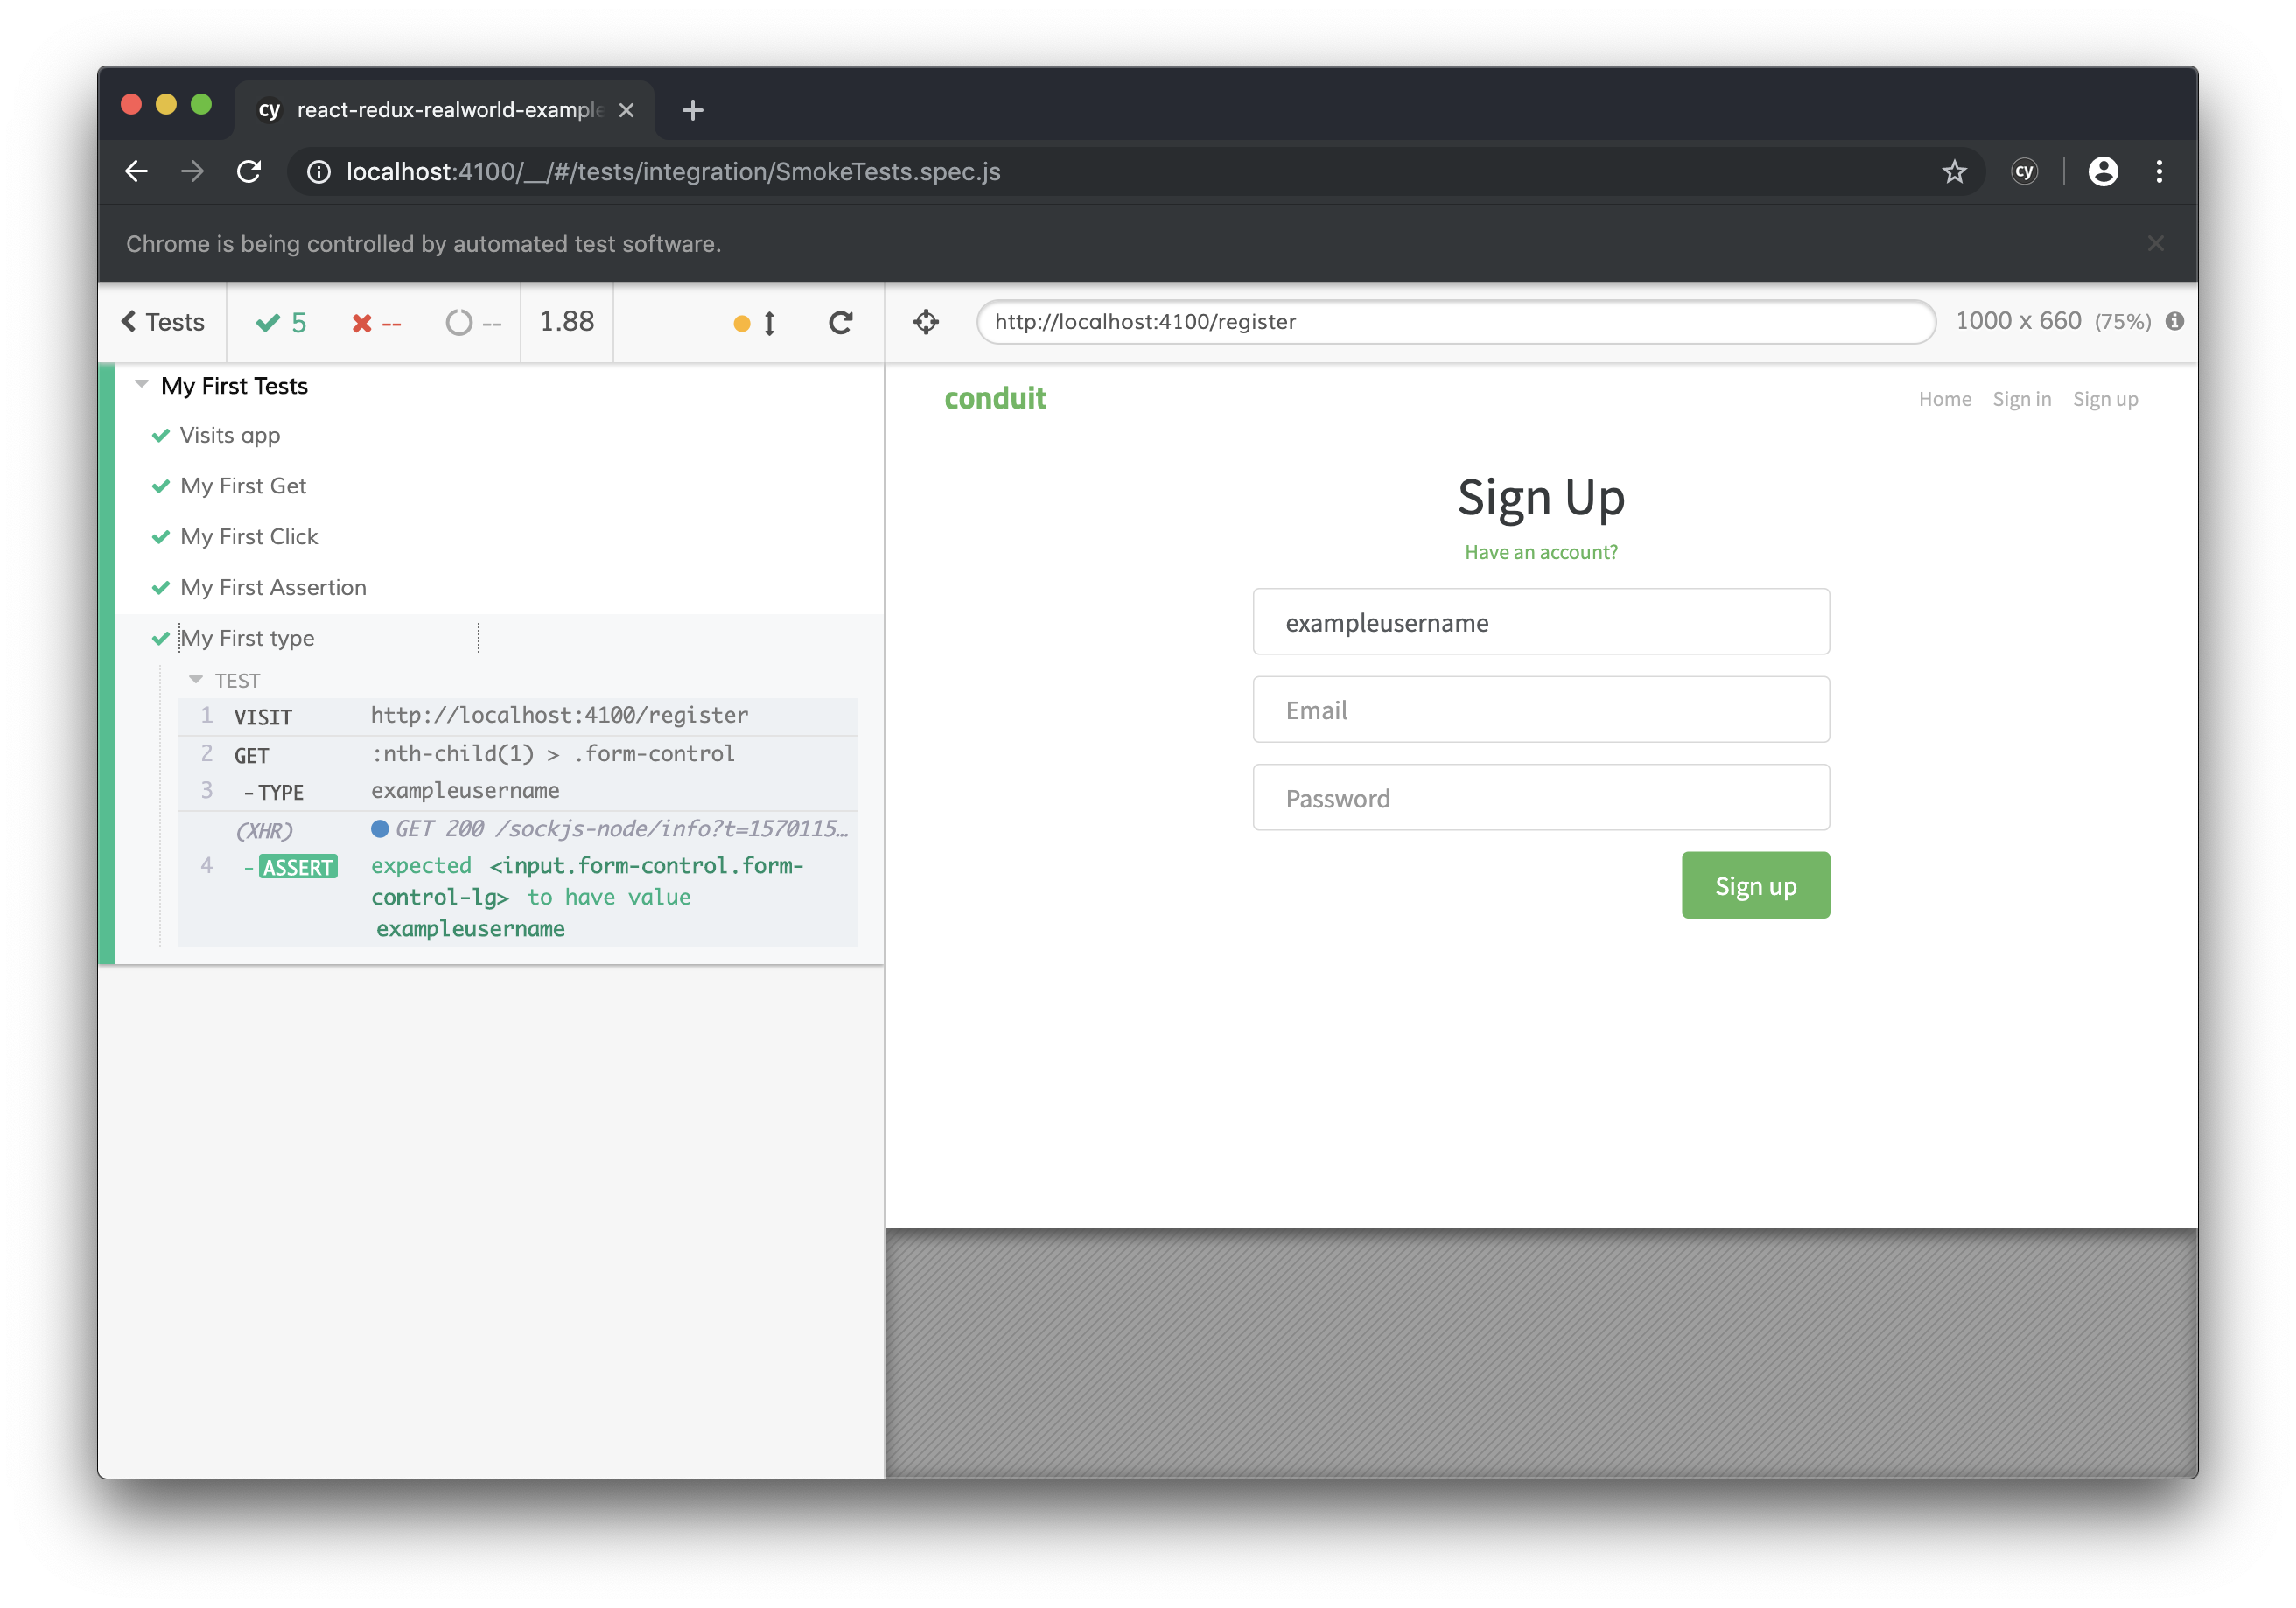
it('My First type', function() {
  cy.visit('http://localhost:4100/register')

  cy.get(':nth-child(1) > .form-control')
  .type('exampleusername')
  .should('have.value', 'exampleusername')
})
Test opens a page /register, search for specified input and put text: ‘exampleusername’. Afterwards with function:
.should('have.value', 'exampleusername')An assertion is executed to ensure field contains correct value.
Application windows will look:
Ending
Our final test scenario presents as follow:
describe('My First Tests', function() {
    it('Visits app', function() {
        cy.visit('http://localhost:4100/')
    })

    it('My First Get', function() {
        cy.visit('http://localhost:4100/')
        cy.get('.navbar-brand')
    })

    it('My First Click', function() {
        cy.visit('http://localhost:4100/')
        cy.get(':nth-child(3) > .nav-link').click()
    })

    it('My First Assertion', function() {
        cy.visit('http://localhost:4100/')
        cy.get(':nth-child(3) > .nav-link').click()
        cy.url().should('include', '/register')
    })

    it('My First type', function() {
        cy.visit('http://localhost:4100/register')

        cy.get(':nth-child(1) > .form-control')
        .type('exampleusername')
        .should('have.value', 'exampleusername')
    })
})
Complete code can be found also on my repository:
https://github.com/12masta/react-redux-realworld-example-app/tree/1-cypressCypress is a powerful tool. I am going to continue writing more tests, so expect a new post ;)